How to create stickers iPhone iOS 17? Let’s ditch the boring tutorials and dive straight into making your own awesome sticker packs! From leveraging the built-in Shortcuts app to exploring powerful third-party options, we’ll unlock the secrets to crafting personalized stickers that’ll spice up your messages. Get ready to unleash your inner artist and transform your photos into shareable sticker fun.
This guide covers everything from designing stickers from scratch using iOS 17’s built-in tools to mastering the art of sharing your creations. We’ll compare different methods, troubleshoot common issues, and even give you pro-tips for creating truly unique sticker packs. Prepare to become a sticker-making maestro!
Using the Shortcuts App
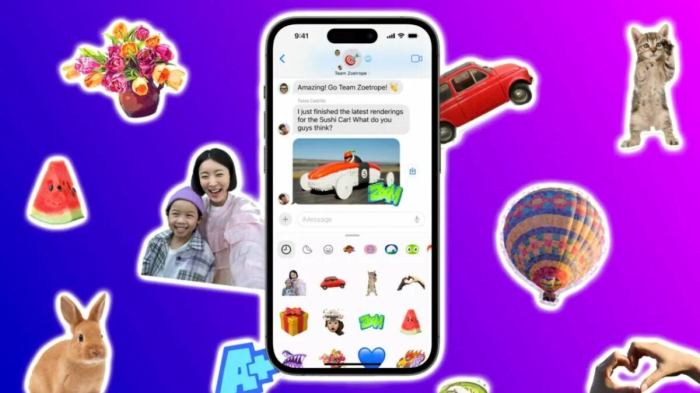
Source: sftcdn.net
Creating custom sticker packs on iOS 17 is easier than you think, especially with the power of the Shortcuts app. Forget tedious manual processes; Shortcuts lets you automate the entire sticker creation workflow, from selecting images to organizing them into a shareable pack. This means you can whip up personalized sticker sets from your photos, downloaded images, or even specific folders in seconds.
The Shortcuts app allows you to create automated workflows, and by combining a few simple actions, you can easily transform your favorite images into a cohesive sticker pack. This method offers a level of customization unmatched by other methods, letting you fine-tune the size, shape, and even add special effects to your stickers before they’re packaged and ready to share.
Creating a Sticker Pack with Shortcuts
Let’s walk through a step-by-step guide to crafting your own sticker pack using the Shortcuts app. We’ll assume you already have a selection of images ready to go. Remember, the exact visual appearance of the Shortcuts app may vary slightly depending on your iOS version.
- Launch the Shortcuts App and Create a New Shortcut: Open the Shortcuts app on your iPhone. Tap the “+” button in the top right corner to create a new shortcut.
- Add the “Get Images” Action: Search for and add the “Get Images” action. This will allow you to choose images from your Photo Library, a specific album, or even from a file sharing service like iCloud Drive. A screen will appear where you can choose your image source. Imagine a screen showing various options like “All Photos,” “Albums,” “iCloud Drive,” etc., allowing you to select where your images reside.
- Add the “Adjust Size” Action: Next, add the “Adjust Size” action. This is crucial for ensuring your stickers are the correct size for iMessage. You’ll need to specify the dimensions. A typical sticker size is around 512 x 512 pixels. A visual representation of this would show a text field where you’d input “512” for width and height. You might also see options for resizing methods like “Fill,” “Fit,” or “Crop.”
- Add the “Make Sticker Pack” Action: This is where the magic happens. Search for and add the “Make Sticker Pack” action. You’ll need to give your sticker pack a name. The screen will show a text field where you can type in a creative name, like “My Awesome Stickers” or “Cute Kittens.”
- Run and Share the Shortcut: Tap the play button to run your shortcut. Once complete, you’ll have a new sticker pack ready to share. A screen showing the newly created sticker pack, ready to be shared via iMessage, will appear. You can see the individual stickers within the pack.
Comparing Sticker Creation Methods
While Shortcuts offer a powerful and customizable approach, it’s beneficial to compare it to other methods available for creating sticker packs.
So you’re all about crafting custom stickers on your iPhone with iOS 17? It’s super easy, but sometimes, you need a little inspiration. Maybe check out this guide on finding the best curling iron for perfectly styled hair before you start designing – great hair, great sticker ideas, right? Then, get back to creating those killer iOS 17 stickers!
| Method | Pros | Cons | iOS Version Compatibility |
|---|---|---|---|
| Shortcuts App | Highly customizable, automated workflow, supports various image sources. | Requires some technical understanding of the Shortcuts app. | iOS 12 and later (though functionality may vary slightly between versions). |
| Third-party Apps | Often user-friendly interfaces, pre-built templates. | May have limited customization options, often require in-app purchases. | Varies depending on the specific app. |
| Manual Creation (using image editing apps) | Maximum control over individual stickers. | Time-consuming, requires significant manual effort. | Compatible with any iOS version that supports image editing apps. |
Three Shortcut Workflows for Sticker Pack Creation
Here are three different workflows you can adapt, depending on your image source:
- Workflow 1: From Photo Library: This workflow uses the “Get Images from Album” action to select images from a specific album in your photo library. Imagine the shortcut interface displaying an option to select an album, for example, “Vacation Photos” or “Cute Dog Pictures”.
- Workflow 2: From Downloaded Images: This workflow uses the “Get Files” action to select images from a specific folder within your Files app. Imagine selecting a folder named “Stickers” that contains downloaded images. You’d see a file browser interface within the shortcut.
- Workflow 3: From a Specific Folder in iCloud Drive: This workflow uses the “Get Files” action, but targets a folder within iCloud Drive. The interface would show your iCloud Drive file structure, allowing you to navigate and select the desired folder.
Leveraging Third-Party Apps
Beyond the built-in Shortcuts app, iOS 17 offers a vibrant ecosystem of third-party sticker creation apps, each boasting unique features and functionalities. These apps often provide more advanced editing tools, a wider array of design elements, and streamlined export options compared to the more limited capabilities of Shortcuts. Choosing the right app depends on your skill level, desired level of customization, and the specific type of stickers you want to create.
Let’s dive into three popular choices, examining their strengths and weaknesses to help you make an informed decision.
Sticker Creation App Comparisons
The following apps offer diverse features and cater to different user needs. Consider your budget and technical skills when selecting the best fit for your sticker-making journey.
- Procreate Pocket: This popular illustration app, while not exclusively for stickers, is incredibly powerful for creating high-quality, detailed designs. Its intuitive interface and robust brush engine allow for intricate artwork. It offers a one-time purchase model, eliminating subscription fees.
- Pros: Extremely versatile; offers a wide range of brushes and tools; excellent for intricate designs; one-time purchase.
- Cons: Steeper learning curve than simpler apps; may be overkill if you only need basic stickers; requires some digital art skill.
- Sticker Maker Studio: This app focuses specifically on sticker creation, offering a user-friendly interface and a wide array of pre-made templates, fonts, and elements. It operates on a freemium model, meaning some features are free, while others require an in-app purchase or subscription.
- Pros: Easy to use; numerous templates and design elements; intuitive interface; good for quick sticker creation.
- Cons: Some features are locked behind a paywall; less flexibility for highly customized designs compared to Procreate Pocket.
- PicsArt: A comprehensive photo and video editing app, PicsArt also includes robust sticker-making capabilities. It provides a wide range of tools, effects, and filters, allowing for highly creative designs. It uses a freemium model with in-app purchases and subscription options.
- Pros: All-in-one editing solution; vast library of effects and filters; strong community features; many free options.
- Cons: Can be overwhelming for beginners; freemium model can lead to unexpected costs; not exclusively focused on sticker creation.
Importing Custom Fonts and Images
Let’s illustrate how to import custom fonts and images using Sticker Maker Studio as an example. The process is generally similar across other apps, though the exact menu options may vary slightly.
To import a custom font, you would typically navigate to the app’s font selection menu. Many apps allow you to browse your device’s existing fonts or download new ones from online repositories. Once you’ve selected your font, it will be available for use in your sticker designs.
Importing images is equally straightforward. Most sticker-making apps allow you to import images directly from your device’s photo library. You can then use these images as the base for your stickers or incorporate them as design elements within your creations. The imported images will be integrated into the app’s design tools, allowing you to resize, reposition, and edit them as needed to create your perfect sticker. For example, you could import a photo of your pet and add text and other embellishments to create a personalized sticker.
Designing Stickers from Scratch
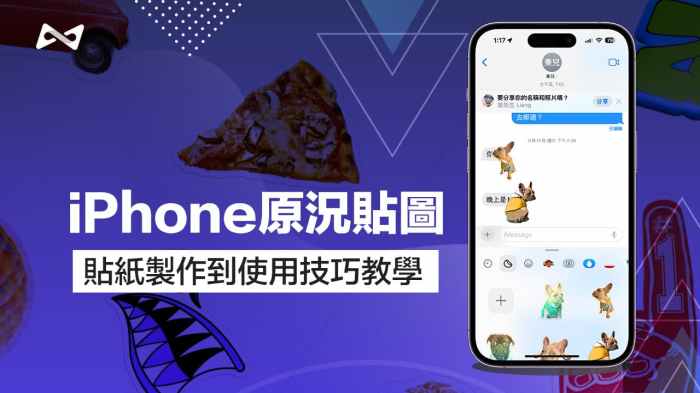
Source: com.tw
So you’re ready to ditch the pre-made sticker packs and unleash your inner artist? Creating your own stickers on iOS 17 is easier than you think, opening up a world of personalized messaging fun. Forget generic emojis – let’s dive into designing unique stickers using the tools already on your iPhone.
Designing stickers directly on your iPhone leverages the power of built-in apps like the Markup tool and other image editing apps. This allows for a streamlined workflow, eliminating the need for external software or complicated processes. You can quickly whip up cute illustrations, add witty text, and create perfectly sized stickers optimized for different messaging platforms. The key is understanding the nuances of each app and how to tailor your creations for optimal display.
Sticker Design Optimization for Messaging Apps
Different messaging apps have varying requirements for stickers. To ensure your creations look their best, consider the following:
Size: While there isn’t a universally enforced sticker size, aiming for a square format around 512 x 512 pixels usually works well across most platforms like iMessage, WhatsApp, and Telegram. Smaller sizes might look pixelated, while excessively large ones could slow down message loading. Experiment to find the sweet spot that balances visual quality and file size.
Format: PNG is generally the preferred format for stickers. PNG supports transparency, which is crucial for stickers with intricate designs or irregular shapes. Avoid JPEG, as it compresses the image and can lead to a loss of quality and detail, particularly around the edges of your sticker where transparency is important.
Transparency: Transparency is key to making your stickers pop! A transparent background allows the sticker to blend seamlessly with the chat background. Most image editors allow you to adjust the transparency level. Make sure your design clearly shows what parts should be transparent and which parts should remain opaque.
Creating Stickers with Varying Elements Using Built-in iOS Tools
Let’s get practical. Here’s how to create stickers with different backgrounds, shapes, and text overlays using iOS’s built-in tools:
Backgrounds: You can start with a solid color background using the Markup tool or a more complex background using an image editing app. For instance, you can create a vibrant background in a color that complements your sticker’s design, or you could even use a photo as a background, ensuring it is appropriately sized and resolution to maintain quality. Consider using a blurred background to subtly add visual depth. Remember to adjust transparency to reveal the edges of the sticker.
Shapes: iOS’s built-in tools allow you to create stickers in various shapes. The Markup tool offers basic shapes like circles, squares, and rectangles, which can be used as templates or combined with other elements. More advanced image editing apps offer more shape options. Once your shape is created, you can add images or text inside.
Text Overlays: Adding text to your stickers adds personality. Use the Markup tool’s text feature to add catchy phrases, funny quotes, or even just a simple name. Experiment with different fonts, sizes, and colors to create a visually appealing design. Consider using a font that is easily readable at a small size, maintaining clarity even when the sticker is scaled down in a chat window. Ensure your text color contrasts well with the background for better readability.
Organizing and Sharing Sticker Packs: How To Create Stickers Iphone Ios 17
So you’ve crafted the perfect sticker pack, brimming with adorable illustrations or witty memes. Now what? Letting your creations gather digital dust is a crime against cuteness! This section dives into the nitty-gritty of saving, organizing, and sharing your sticker packs so everyone can enjoy your artistic genius. We’ll cover the best practices for naming and structuring your packs, along with a comparison of different sharing methods. Get ready to unleash your sticker-sharing superpowers!
Saving and sharing your meticulously crafted sticker packs is surprisingly straightforward. Whether you’re using AirDrop for lightning-fast transfers between Apple devices, relying on email for broader reach, or leveraging messaging apps for instant gratification, there’s a method to suit your needs. Proper organization is key, however, to ensure easy access and sharing.
Saving and Sharing Sticker Packs via Different Methods
Before diving into the specifics of each method, remember to always back up your sticker packs. Consider saving copies to iCloud Drive or your computer to avoid losing your hard work. This precautionary step is crucial for maintaining your creative assets.
| Sharing Method | File Size Impact | Ease of Use | Compatibility |
|---|---|---|---|
| AirDrop | Minimal impact; transfers quickly. | Very easy; requires nearby Apple devices. | Apple devices only. |
| Moderate impact; file size limits may apply. Consider compressing images for larger packs. | Easy; widely compatible but slower than AirDrop. | Most email clients and devices. | |
| Messaging Apps (iMessage, WhatsApp, etc.) | Moderate impact; app-specific file size limits may apply. Compression may be necessary for larger packs. | Easy; instant sharing within the app’s ecosystem. | Users of the specific messaging app. |
Best Practices for Naming and Organizing Sticker Packs
Clear and consistent naming is crucial for easy retrieval. Imagine searching through hundreds of unnamed files – a digital nightmare! Use descriptive names like “Cute Kittens Stickers,” “Travel Stickers,” or “Funny Emojis.” Avoid generic names like “Stickers 1” or “Pack A.” For organization, create folders within your Files app to categorize sticker packs by theme or occasion. Think of it as creating a perfectly curated sticker library – your personal sticker paradise! Using a consistent naming convention (e.g., “Theme – Date Created”) adds another layer of organization. This allows you to easily locate and manage your sticker packs, even months after creation.
Troubleshooting Common Issues
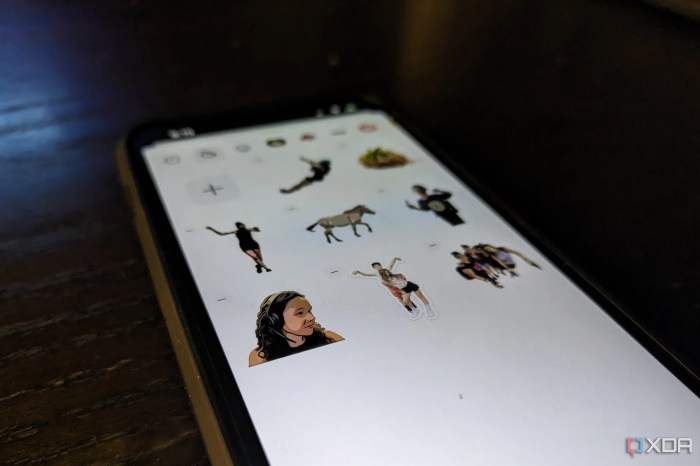
Source: xdaimages.com
Creating custom sticker packs on iOS 17 can be a blast, but sometimes things don’t go as smoothly as planned. From frustrating app crashes to baffling image format errors, a few hiccups can quickly derail your sticker-making mojo. Don’t worry, though – we’ve got you covered with solutions and preventative measures to keep your sticker creation flowing.
Image Format Incompatibilities and Resolutions
Sticker creation hinges on using the right image formats and resolutions. iOS 17’s sticker functionality has specific requirements, and using incompatible formats or low-resolution images will lead to issues. Incorrect formats can result in the app refusing to import your image, while low resolution leads to blurry, pixelated stickers.
Supported Image Formats
Using unsupported image formats is a common source of frustration. iOS 17’s sticker creation tools generally support PNG and JPEG formats. PNGs are generally preferred due to their support for transparency, allowing you to create stickers with clear backgrounds. Attempting to use formats like GIF, TIFF, or RAW files will likely result in an error.
Resolution and Size Considerations
The resolution of your images directly impacts the quality of your stickers. Low-resolution images will appear blurry and pixelated once scaled up to sticker size. Aim for high-resolution images (at least 512×512 pixels) to ensure crisp, clear stickers. Images that are too large might also cause problems with processing times or app crashes.
App Crashes and Unexpected Errors, How to create stickers iphone ios 17
Occasionally, the Shortcuts app or third-party sticker creation apps might crash unexpectedly, leaving you with unfinished sticker packs and a whole lot of frustration. This can be caused by a number of factors, from insufficient device memory to corrupted files or app bugs.
Troubleshooting App Crashes
Several steps can be taken to resolve app crashes. First, ensure your iPhone has sufficient free storage space. Apps often crash due to lack of memory. Secondly, force-quit the app and restart your device. This can clear temporary files and resolve minor glitches. If the crashes persist, try updating the app to the latest version, which may contain bug fixes. As a last resort, reinstalling the app can sometimes solve the problem. If issues persist even after reinstallation, contacting the app developer for support is a good idea.
Preventative Measures for Smooth Sticker Creation
Preventing problems is always better than fixing them. Here are some key preventative measures:
- Always back up your work frequently. This ensures you won’t lose progress if something goes wrong.
- Use high-resolution images in supported formats (PNG is generally recommended).
- Ensure your iPhone has enough free storage space before starting the sticker creation process.
- Keep your apps updated to benefit from bug fixes and performance improvements.
- Regularly restart your device to clear temporary files and improve overall performance.
End of Discussion
Creating custom stickers on your iPhone running iOS 17 is now easier than ever. Whether you’re a seasoned digital artist or a complete newbie, this guide has equipped you with the knowledge and tools to design, share, and conquer the world of personalized stickers. So go forth, create, and share your sticker masterpieces! Let your creativity run wild and watch your messages transform.

